The West African Overlanding Adventure of 2025 – From Namibia to Finland
In early 2025, we embarked on an epic overlanding journey, driving from Namibia to Finland through the rugged and fascinating countries of West Africa.
This wasn’t just a road trip—it was a true overland adventure filled with challenging borders, remote tracks, wild camps, and incredible wildlife encounters. We completed the journey in just over four months, departing Namibia at the end of February and arriving in Helsinki on June 26th.
Here’s a “nutshell” recap about our overland travel route through West Africa and Europe. Most people drive this route from north to south, so there was not much information available about the route in the opposite direction, from south to north. Especially, finding information about the visas was tricky.
However, rest assured that we will also upload a comprehensive visa guide to our website soon! From there, you will find all the information concerning the visas you’ll need for this journey (for EU passport holders).
We’re also writing detailed stories about all the adventures we had in our Substack publication. So remember to subscribe so that you won’t miss any intriguing stories!
Namibia – One of Our Favorite Countries
We left our friends’ place in Windhoek after mid-February and first drove to say our goodbyes to Swakopmund, the coastal town where we had spent so much time during the years.
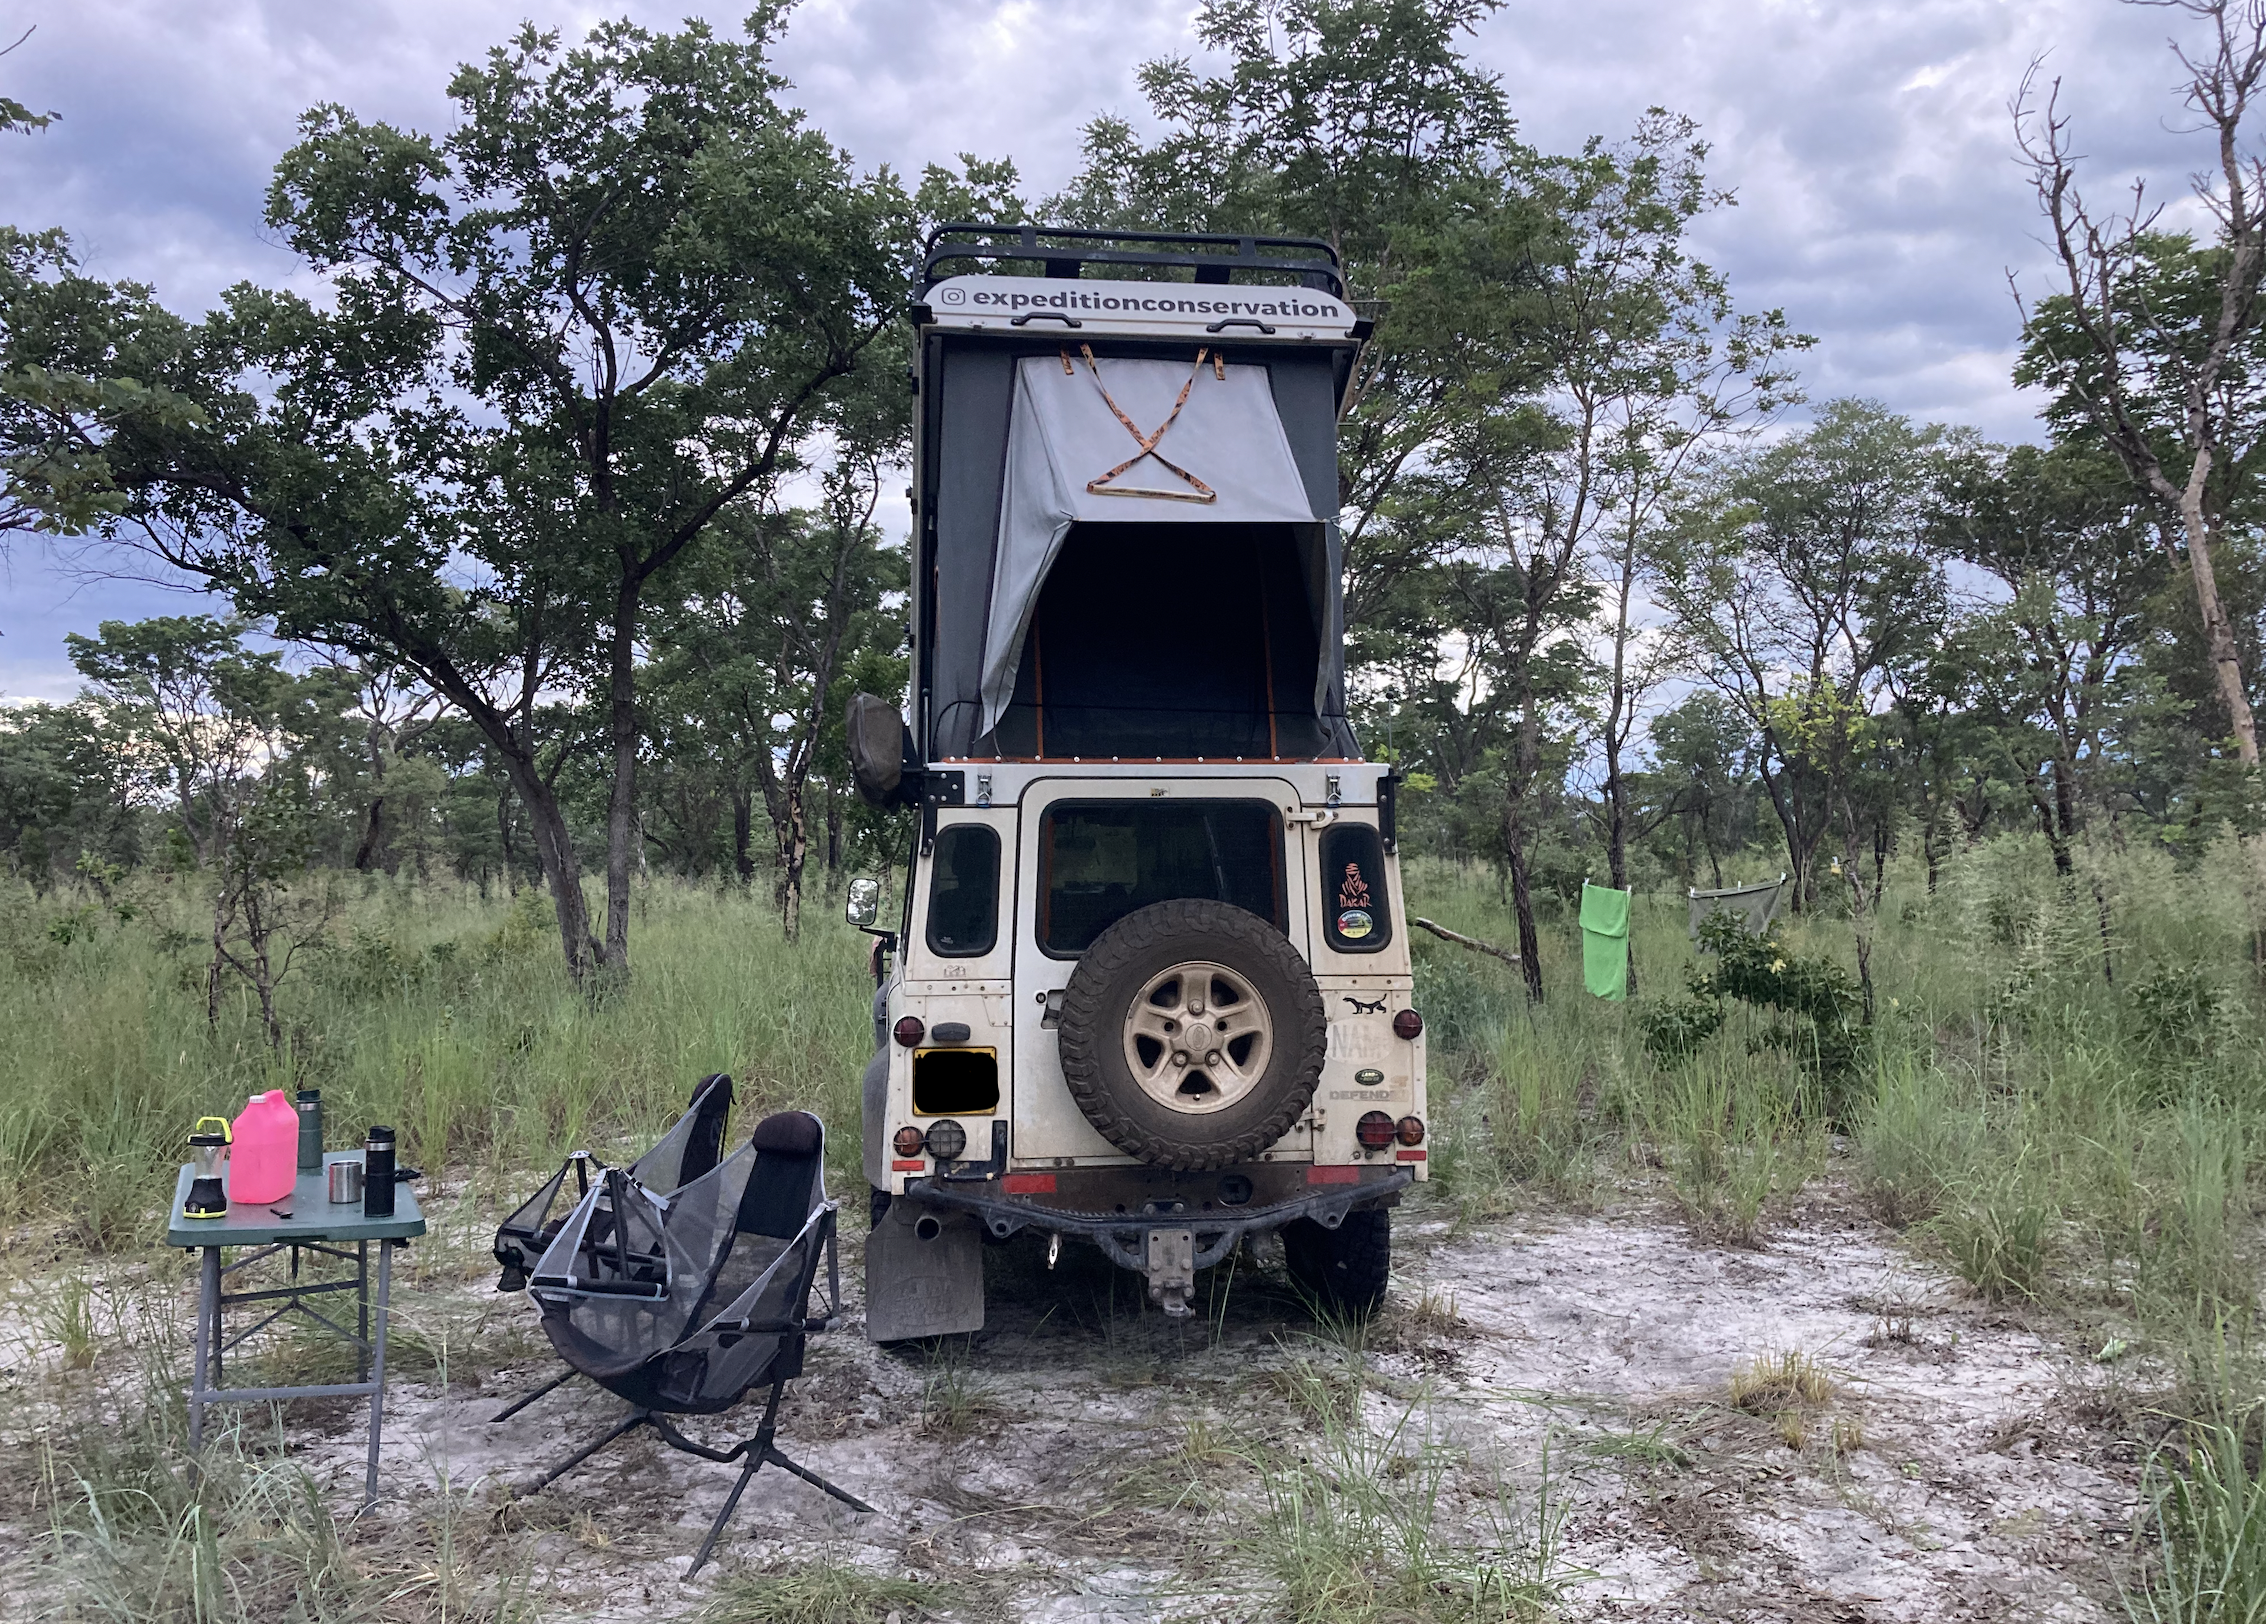
On our way north, we decided to stop by one of our all-time favorite places in Namibia: the Hoanib River! The riverbed was still dry, so we got to say goodbye to our beloved desert-adapted elephants, too, and we spent two beautiful nights wild camping in this fantastic, remote region.
We also spent excellent nights wild camping at the Menhir 4×4 track and woke up to find brown hyena tracks close to our vehicle in the morning.
The road then took us to Angola through the Caprivi region. When we left Namibia, it felt as if the West African adventure had truly begun!
Angola – The First Steps of Our Overland Adventure
Our first country on this West African overland route was Angola. Our choice of route from Namibia to Angola took us through a remote track with a bit of mud, but it was still fun to drive.
The landscapes were breathtakingly beautiful and diverse, but the language barrier (as neither of us speaks Portuguese, only a little Spanish) made things a bit tricky. Still, it was a lovely and enjoyable beginning to our journey north.
The Democratic Republic of the Congo (DRC) – A Pleasant Surprise
From Angola, we continued into the Democratic Republic of the Congo (DRC).
Here, we crossed the mighty Congo River at the same area where David Livingstone once marveled at the river flowing into the Atlantic Ocean. Although our time in the DRC was brief—just a few days—the experience felt surreal and adventurous. We drove in the dark because we lost several hours at the border and then found an isolated wild camp on an old quarry. All officials were friendly and professional, and we encountered no problems.
We spent only one night in the DRC, but it sure was a memorable part of our journey.
The Republic of Congo – All About the Western Lowland Gorillas
On March 14th, we crossed into the Republic of Congo, right on time for our pre-received visas. This country offered one of the biggest highlights of our West Africa overland trip: seeing the Western Lowland Gorillas and visiting the remote and fantastic Odzala-Kokoua National Park.
We had initially planned to continue to Gabon, but border closures and visa difficulties due to the then-upcoming general elections forced us to adjust our overlanding route northward, toward Cameroon.
Cameroon – Onwards Through the Legendary 4×4 Overland Track: Banyo Crossing
We crossed Cameroon relatively quickly—in just four days, five nights—but packed in a lot. The lively capital, Yaoundé, gave us a glimpse of city life, while the legendary Banyo route unexpectedly pushed our 4×4 driving skills more than we had anticipated. For anyone passionate about overland travel, the Banyo track into Nigeria is a true test of both vehicle and driver – especially so, if there have been rains!
Nigeria – Warm Welcomes and Non-Existent Personal Spaces
Nigeria turned out to be a pleasant surprise in our West African overlanding adventure. The people were extremely friendly. However, they didn’t have a clue about personal space as a concept, and that made us, as Finns, feel pretty uncomfortable at times. However, we eventually adapted and found that monasteries and churches offered some of the safest and most welcoming camping possibilities.
Driving was relatively smooth, and despite the numerous military/police/local checkpoints, we encountered no issues. Even Lagos turned out to be less confusing and chaotic than we expected!
One of the highlights of. Nigeria was also visiting the Afi Mountain, where we saw the mandrills and sweated profusely in the extremely humid weather.
Benin – The Land of Voodoo
Benin was fascinating—we learned more about the country’s unique and lively voodoo culture, an intriguing topic! Aboméy had one of the strangest feelings of a town we’ve ever visited. Still, we had a good guide on our voodoo tour and learned a lot more about this animistic, official religion of Benin.
If we had had more time to spend in Benin, we would’ve also wanted to visit the Pendjari National Park in the northern part of the country. However, the rains had already arrived there as well. So we stick to the south.
We also took a brief break and spent a week in the modern, neat, and well-functioning Cotonou. We arranged visas for the onward journey, repaired and serviced our Defender, and enjoyed some rest in an air-conditioned apartment.
Togo – A Quick Overland Stop
We crossed Togo in just one night before moving on to Ghana. Such is sometimes the reality of long-distance overland travel: sometimes you pass through quickly, saving countries for “next time” (whether that ever comes or not).
Lomé seemed an uninteresting place, so we didn’t really feel bad about skipping this small country for now.
Ghana – Friendly Faces on the Coast
Ghana was welcoming, with English-speaking locals and a vibrant coastal atmosphere. However, we had to use all our negotiation skills at the border, so that we were allowed in without a Carnet de Passage and without paying an exorbitant amount for our Namibian-registered vehicle – but we succeeded after hours of negotiation!
After that, we enjoyed what the coastal highway had to offer: relaxing beach camps, freshly grilled fish, and a lot of ocean spray.
Heavy rains had already started, also, i.e., in Mole National Park, making wildlife viewing difficult, so we stuck to the coast before continuing on our overlanding route westward. Our negotiation skills were put to another grilling test at the exit border, where we again managed to exit without a carnet de passage and without paying a dime. We congratulated ourselves–for a reason!
Ivory Coast – Contrasts of Overland Travel
In Ivory Coast, we found many great wild camps but were saddened by the endless palm oil plantations replacing natural landscapes. Abidjan turned out to be an expensive and futile detour on our way towards Guinea.
Guinea – The Challenge of Crossing Through in Five Days
Guinea tested us with a strict timeline—we had only five days to cross without needing a visa sticker from Conakry. Despite the rush, Guinea left us with memories of lush green scenery, friendly people, and challenging but rewarding overland driving.
Some roads were great, while others had once been roads but were now more like mudholes, one after another. But we made it in five days to the border of Senegal!
Senegal – Desert Overland Travel and Ocean Views
Senegal reminded us of Namibia with its desert-like landscapes. We also managed to avoid Dakar because we got a free (!) Passavant for our Defender for 30 days at the border without any hassle–and not the usual 5-day one that many overlanders have got. We were pleased about that.
We got to enjoy places like the sacred “cat tree” and relaxing days by the sea at the famous, but a bit uninspiring Zebra Bar. For overlanders, Senegal offers a good mix of adventure and downtime.
Mauritania – and the Harsh Sahara Desert Winds
Our first fully Islamic country, Mauritania, was a rugged one. Harsh Harmattan winds swept the Sahara and challenged both us and our Defender. It was challenging to find decent places to camp that offered at least some shelter from the relentless winds.
Yet this stretch of desert overlanding was unforgettable—especially when we witnessed the famous, massive Iron Ore train crossing the sands. And on this leg, we also got stuck, but dug ourselves out in the dark by using our recovery tracks for the first time ever!
Mauritania had unreal landscapes, but the shops offered practically nothing to buy, and the strict Islamic atmosphere didn’t really entice us. But it was an experience.
Western Sahara & Morocco – The Gateway Out of Africa
Western Sahara, now part of Morocco, offered endless dunes, wild camps, and harsh desert winds, which made cooking with gas extremely challenging. It still reminded us of Namibia so much, like the area of the Menhir 4×4 tracks in the Kunene. We must admit that we already missed Namibia.
Finally, in Morocco, it felt as if we had already reached Europe. Modern, organized, and full of delicious food and colorful souks (markets), Morocco was a good end to our West Africa overland route. From Tangier, we ferried across the Strait of Gibraltar into Spain, feeling both proud and nostalgic for completing a massive adventure through the continent.
Overlanding Through Europe – The Final Push to Finland
Once in Europe, our Defender rolled north along the eastern coast of Spain, through France, Germany, Poland, Lithuania, Latvia, and Estonia. To our surprise, France turned out to be our favorite country on this route. It offered great wild camps, lovely surroundings in little villages, and good food.
From Tallinn, Estonia, a final ferry brought us to Finland, where we arrived in Helsinki on June 26th, 2025—after nearly four and a half months on the road.
When we drove out of the ferry to the shores of Helsinki with Honey Badger the Defender, it felt quite unreal–we were really there and we had driven all the way from Namibia! We did it!
Reflections on Our West Africa Overlanding Adventure
This West Africa overland expedition was everything we had anticipated: challenging, rewarding, unpredictable, and unforgettable. From the wild Western Lowland Gorillas in the Congo to the Sahara winds in Mauritania, it tested us in many ways and gave us memories that will last a lifetime.
After six years (!) of overland travel all around Africa, leaving the continent was a bittersweet experience, as Africa is forever imprinted into our hearts and souls – and we miss it already. We will definitely return someday, but now it’s time for something else.
New adventures await—and yes, we’re already planning our next overlanding expedition on a new continent!
So stay tuned! The end of one expedition is just the beginning of another one. 🙂

Essential Tools for a Successful Overlanding Travel Adventure: A Comprehensive Guide
When you’re gearing up for your first overlanding travel adventure, one of the most common questions is, “What essential tools and equipment should I have in my vehicle?”
It’s a question that pops up frequently in overlanding travel forums and discussion groups. While plenty of “round-up” lists are available online, we’ve consolidated the best advice into this definitive guide. Whether you’re just starting out or looking to refine your gear setup, this post will help you prepare for a safe and enjoyable journey.
Want to get overlanding travel tips and stories right in your inbox? Subscribe to our Substack!
Basic Recovery Gear: Your Lifeline in Tough Situations
Overlanding travel often takes you off the beaten path, where getting stuck in mud, sand, or snow is more a question of “when” than “if.” That’s why having a solid recovery gear kit is non-negotiable.
Here’s what you need to include:
- Tow Rope: A sturdy tow rope is your first line of defense when you need a quick tug out of a sticky situation.
- Snatch Strap/Kinetic Strap: These are designed to stretch and recoil, providing the kinetic energy needed to free a stuck vehicle.
- Snatch Block: A snatch block is useful in winching situations. It helps change the direction of the pull and doubles the pulling power of your winch.
- Tree Saver: Protect the trees you anchor your winch to with a tree saver strap, which distributes the load and prevents damage.
- D-Ring Shackles: To secure your straps and ropes, you’ll need at least two or three of these strong connectors.
- Thick Leather/Fabric Gloves: Protect your hands from frayed wires and sharp edges while handling recovery gear.
This basic recovery set can make the difference between being stranded for hours or getting back on the trail in minutes.
While a winch is optional, it’s a valuable asset, especially if you’re traveling solo. Just ensure your winch is rated for your vehicle’s weight and that the cable or rope is always in top condition. Regular maintenance checks are crucial — you don’t want to discover a malfunction when you’re stuck in the middle of nowhere.
Additionally, your vehicle must have strong, purpose-built recovery points, typically attached to the chassis. If your vehicle lacks these, invest in having them professionally installed. And remember, never use factory “attachment points” for recovery — they’re designed for securing the vehicle during transport and can fail catastrophically under stress.

Supplementary Recovery Tools: Don’t Leave Home Without Them
While your basic recovery kit covers most scenarios, a few additional items can further increase your self-recovery capability:
- Metal Shovel: A must-have for digging out tires from sand, mud, or snow.
- Recovery Boards: Essential for gaining traction when your tires are spinning helplessly. Quality boards like TREDs or MaxTrax are worth the investment; avoid all flimsy alternatives (they’ll just break)!
- High-Quality Flashlight: A reliable flashlight is crucial for any night-time recovery efforts or roadside repairs.
- Tire Repair Kit: A comprehensive tire repair kit will keep you rolling from punctures to slow leaks.
- Tire Inflator or Filling Foam: Handy for quick, temporary repairs until you can get a proper fix.
- Sturdy Bottle Jack: Necessary for lifting your vehicle when changing a tire.
- Hi-Lift Jack: While not always necessary, a Hi-Lift jack can be invaluable in certain situations. However, it’s heavy, and using it incorrectly can be dangerous. Proper training is essential before relying on it in the field.
Additional Gear for Peace of Mind
Beyond recovery tools, a few other items can make your 4×4 overlanding travel experience smoother and safer:
- Radiator Seed Net: Keeps debris from clogging your radiator, preventing overheating in tough environments.
- Q20/WD40 Spray Bottle: Perfect for cleaning and protecting electrical connections exposed to moisture.
- Duct Tape & Cable Ties: These versatile items can temporarily fix a multitude of issues.
- Electrical Tape: Vital for patching up damaged wiring and protecting against short circuits.
- Metal Jerry Cans for Water and Diesel/Petrol: Especially if your vehicle doesn’t have a long-range fuel tank, have a 20-litre jerry can or two for extra fuel and a longer range. One jerry can for drinking water is also recommended; water is the most important thing to have if you get stranded somewhere. It’s usually a yellow can for diesel, green for petrol, and blue for drinking water. Those NATO jerries are the best and most robust.
- Water filter/purifier: Having a water filtering system may save your life! Always carry one. We use the Lifestraw Mission system for quick and efficient purification during our overland travel.
Basic Tool Set: Ready for On-the-Spot Repairs
A well-curated tool set is indispensable on any overlanding trip. You don’t need a massive box filled with every tool under the sun — just a selection of essentials like wrenches, spanners, and pliers that can handle most repairs and adjustments on the road.
Spare Parts: Be Prepared for the Unexpected
One of the best ways to avoid being stranded is by carrying a few key spare parts.
Research your vehicle’s weak points and stock up on components that are prone to failure and hard to find in remote locations. For example, on our Land Rover Defender Puma 2.4, we carry tie rod ends, bushings, wheel bearings, spare relays, an ignition switch, and basic maintenance parts like filters and fluids.
Conclusion: Gear Up for Your 4×4 Overlanding Travel Adventure
Equipping your vehicle with the right tools and gear is essential for any overlanding trip.
This list covers the basics, but as you gain more experience, you might find other items that suit your specific needs. The key is trying to be prepared for whatever the road — or lack thereof — throws at you.
So, pack up, check your gear, and confidently hit the road. Here’s to your next great overlanding travel adventure!
Happy travels! 😎
* This post contains affiliate links. Using them will not cost you anything extra, but we may receive a small commission if you do. A true win-win situation!
Experiencing the Amazing Chitake Springs in Mana Pools National Park in Zimbabwe
We were lucky to briefly visit Chitake Springs in the prime time of mid-October, when the dry season reached its peak and game viewing was at its highest in the Mana Pools National Park in Zimbabwe.
Here is a post about the awesome Chitake Springs! This post is also packed with information about camping in Chitake Springs and the prices of Chitake Springs in Mana Pools.
Overall, it was a great experience, even though we were there very briefly, only for one night. But one night was all that was available to book as a walk-in guest, so we grabbed the chance.
Driving to Chitake Springs in Mana Pools National Park in Zimbabwe
Driving to Chitake Springs in Mana Pool’s National Park is pretty straightforward. From the 2nd gate, you turn right onto the transfer road, which is in the opposite direction if you were going to the Main Camp (Nyamepi).
Note that you’re not allowed to go to Chitake Springs for a day visit without paying the $35 day visit fee at the Main Camp! So if you don’t have a booking or a day visit fee paid, you cannot go there.
We do understand this policy, as the place is so small that having a lot of day visitors around would ruin the atmosphere.
You only need to drive on the transfer road for about 8 kilometers. Then, you turn off from that main road onto a small dirt track that leads straight into the bush.
At first, driving is slow but easy for a few kilometers. Still, after that, it’s better to engage your low gear and controllably maneuver yourself down the relatively steep sand slopes to the campsites.
Then, if you want to go to the other side of the river, where the Springs are located, you need to cross the riverbed, which has some sand (but not deep), and go up to the other side.
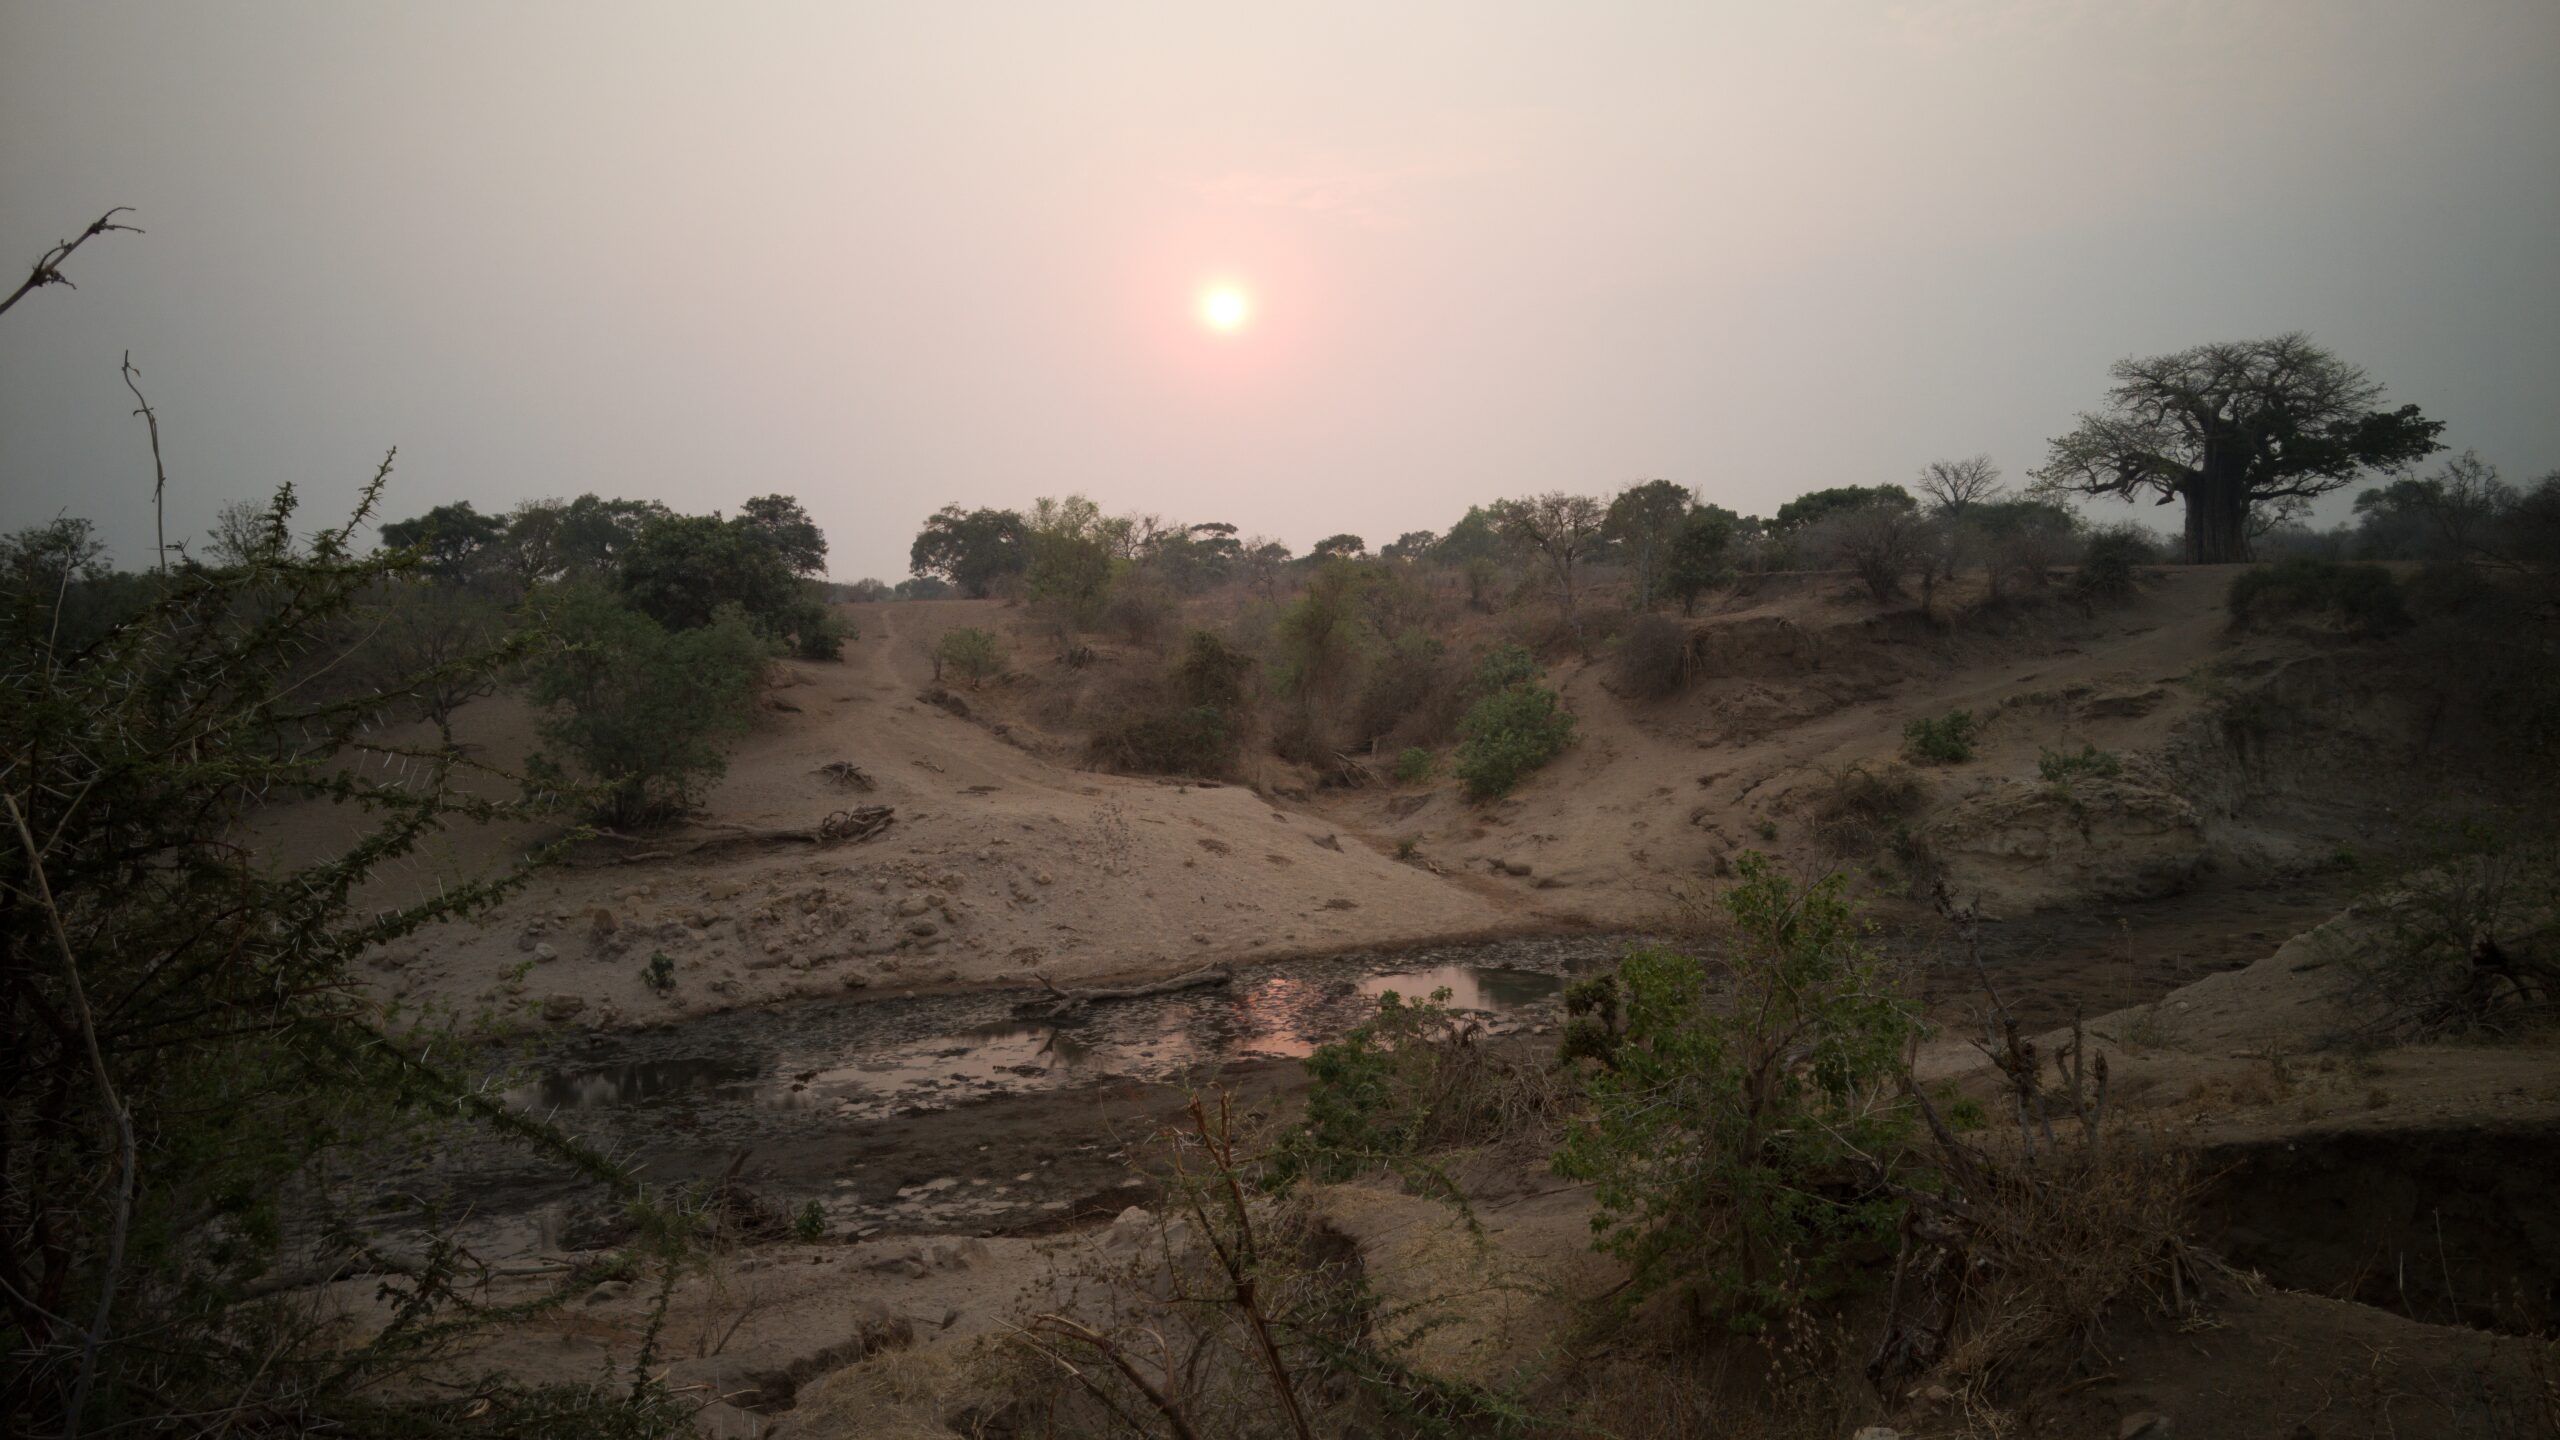
The Beautiful Chitake Springs
The Chitake Springs itself is gorgeous, and you can go and drive to the famous Fig Tree, from where you’ll have the best views and positions to watch the opposite slopes and the Spring at the bottom.
You can set up your chairs for a picnic and sit out your day, watching which animals come down to drink. If you are fortunate, you may even see the herd of buffaloes coming down for a drink amongst those famous dust clouds.
But – having a large herd of buffaloes is quite rare.
While we were there, we also met a film group. They had been there at the Fig Tree for three weeks(!) already, and only one day had they had the chance to film a big group of 400 buffaloes coming down the opposite hill.
They had camera traps set all over the place to watch out for them and to send an alert to avoid missing anything special if they were elsewhere at that time.
We spent only one night at Chitake Springs’ campsite 1, which is one of the best on the river shore, but it is on the other side of the river from the Springs themselves.
The Best Campsites in Chitake Springs
The best campsites at Chitake Springs are numbers 1 and 3B. Many people also prefer the Baobab campsite on the same side of the river as the Springs.
If you go to Chitake Springs, try booking either of these campsites. Campsite #2 is on the other side of the river, too. It’s closer to the Springs itself but it’s very bushy with no views to anywhere, and you still have to drive to the Fig Tree to see the Springs. This is why we don’t recommend that campsite.
It’s also not allowed to camp at the Fig Tree (for obvious reasons), but you can spend the whole day there, make your lunch, and just sit and wait. And it will be a day well spent.
We observed many animals come to drink during the day: impalas, kudus, a lot of baboons, vervet monkeys, etc. And four buffaloes.
The Price of Chitake Springs
Let’s face it: it is expensive to camp in Chitake Springs.
During our almost five years of travels around these areas, it is one of the most expensive campsites we’ve ever visited in Southern and Eastern Africa.
It costs US$300 per campsite per night if you book it in advance.
But, if you go to the main office in the Nyamepi camp as a walk-in customer, you can book it for US$70 per person per night (as a walk-in price). These prices were valid in October 2023, and they are subject to change in 2024. So, please double-check the current prices before you go to Mana Pools.
However, US$70 per person is still expensive, so you have to consider whether it is worth it.
We had heard so much praise for this place, so we wanted to see and experience it. That’s why we stayed one night, which happened to be free on campsite 1 when we visited Mana Pools.
Chitake Springs is usually fully booked in advance, so we were pretty lucky to find a spot even for that one night.
Download the original info booklet from Mana Pools
Was Going to Chitake Springs Worth It?
So, in the famous hindsight, was it worth it? Well, yes, it was for us.
However, to get the most out of that place, you would ideally need to spend at least three nights over there and preferably have a guide who could take you to bushwalks into the surrounding areas.
Without the possibility of going on a walk in the bush, you don’t get so much out of your visit. You can drive only a few tracks around, and the area is pretty tiny.
There is also one big lion pride (33 members, we heard!) living in the Chitake Springs area, but you cannot go into the bush alone without an armed guide.
It could potentially be hazardous for you. So, you would need a Game Ranger to take you on the walks to get around.
But then again, if you stay at the Baobab campsite, you will have absolutely fabulous 360-degree views all over the Chitake Springs area, and you may see more animals from there, too.
The Baobab campsite is on top of a high hill, so it can be very windy, but you’ll be in total solitude amidst the hundreds of years-old baobabs standing all around you.
It is highly recommended. Even if you don’t stay overnight, go and have a look at the place. Stop, make some coffee, sit around, and admire the views!

Our Experiences at Campsite 1 in Chitake Springs
During the night, we heard many lions roaring nearby. We also saw some tracks in the morning, but when we looked for them later in the day, we couldn’t find them.
The lions were somewhere in the bushes, which you couldn’t see from the driving tracks. As said, we would have needed a guide to go into the bush on foot to find them, and we didn’t have one, so we couldn’t go.
It frustrated us quite a bit, but don’t ever be that stupid that you would wander into a thick bush where you know that lions are around without a professional, armed guide! That could cost you your life in the worst-case scenario.
There is a saying, “It’s not the lion you see that gets you.” – Always remember that!
So, if you’d like to experience Chitake Springs at its best, go with a guide or hire a Ranger to take you on bush walks. And spend at least three nights there to experience the place fully.
And, if you are lucky, you may even witness the spectacle of a large herd of buffaloes coming down to the Springs to have a drink.
But be aware that that occasion rarely happens! You may have to wait for weeks, or if you are lucky, you may only have to wait a day or only hours. It’s down to luck.
Want to get these stories and tips straight to your inbox? Subscribe to our Substack:
Would We Go Back to Chitake Springs Someday?
Well, honestly, we don’t know. Maybe if we’d have the chance to go there for three days with a guide. But otherwise, we don’t think so.
Generally, it’s better “bang for your buck” to stay in the main camp of Nyamepi (or in the surrounding areas) and drive around the Mana Pools National Park itself in its primary area and along the Zambezi River and experience all the animals over there.
In Chitake Springs, there were fewer animals to be seen compared to the area of Nyamepi and its surroundings. Besides the lions, which we only heard and didn’t see, there were the traditional impalas, kudus, warthogs, etc.
The Chitake Springs was beautiful, and you could get some of that isolated feeling of being in the bush in the middle of nowhere.
But – all the campsites are also pretty close to each other, and you can even hear other people talking if the other campsites are occupied.
It’s also a very popular campsite, so be prepared that it’s almost always fully booked. But if you are lucky like us, you may have a chance to book it as a walk-in customer for the US$70 per person per night price. It is worth it to experience this place once.
But is US$300 for a campsite per night too much? Yes, it is. Even though Chitake Springs was a unique place with fantastic scenery, we think it’s still too steep.
Especially when considering that it’s wild camping without any amenities besides a long-drop toilet, you pay for the experience.
And as it is camping in the middle of the wild, always keep your eyes open to your surroundings!
Wild animals roam freely, especially after dark, so please have a good flashlight with you! But you don’t need to be scared; it’s just part of the fun to be in the middle of the truly wild country.
This time, we didn’t get any iconic photos from Chitake Springs, but even that did not diminish all our positive experiences at this place.
Some Key Take-Aways About Chitake Springs in Mana Pools
Visiting Chitake Springs was an exciting and fun experience, but in general, you may be better off staying in the main area of the park along the Zambezi River, around the Nyamepi camp and doing Game drives there, especially if you want to see a lot of animals.
Mana Pools is a magnificent National Park and a fantastic place! We spent about a week there and fell in love with it. We are already looking forward to visiting again someday.
In conclusion, we’d say that Chitake Springs is a great place to visit at least once in your lifetime. And if you want to stay longer than one night, it’d be better to have a bigger party of people and book it in advance.
The US$300 per night for the campsite will not be so expensive per person when you divide it by 4-6 people. At least two cars could fit nicely at the campsites so that space wouldn’t be a problem.
Maybe next time we’ll have some friends with us?